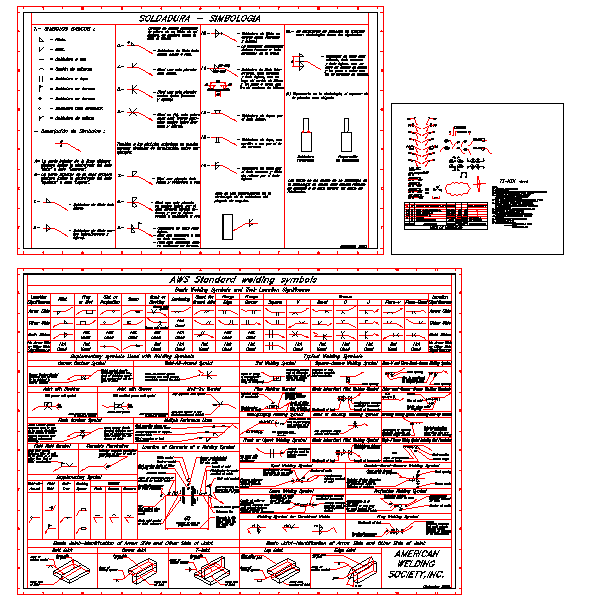
Welding Symbols DWG Block for AutoCAD
WELDING SYMBOLS
Drawing labels, details, and other text information extracted from the CAD file (Translated from Spanish):
material list, unit, cathode holder frame, designation, frame, mca., cant., steel, material, detail, cut, tx-xxx, color finish enamel xxxx, assembled the complete piece not separately., between the mantle and the shaft, the outer machining, of the pulley must be made starting with a plate, epoxy anticorrosive and two coats of welded pieces, observations, see sheet x, see set, total, notes.-, section, see det. , issued for approval, revisions, no., date, approval, description, gfa, review, fact, dzc, by, xxx, cdc, notes, supply sub-management, location:, d.zarate, g.flores, x .xx, xxx, xxxx, project, signature and date, name, division, engineering, chief, coord., review, drawing, contractor, aprobo, lamina m – no:, scale, code, file cad:, ctta, psi, codelco chile, chuquicamata division, area:, series no:, cargo, rev, welding – simbology, – description of symbols:, always indicates the symbology of the side, – fillet welding side, distant, -. welding am- steak. – Bevel one plate, far side, the height of a fillet sun, when you want to specify, dadura, is scored as in, Dica figure, bezel say both. plan-, also to the previous symbols can be added, symbols of termination, such as, for example, far and flush weld, – bevel a side plate, on both sides, by the side, close cord, force and by far, cord or welding flush, nearside, -.. bezel welded flush, ra carried out in the field, -. all this welding must – fillet weld on – the specified welding should be all , around the junction., and far side, with a mitten, near side, – fillet weld inter, and a step or between cen, – plug welding by, the far side., cord flush by the, – Butt welding, with, the near side and fillet, – welding of fillet by, do close., of filling by the side, folding of angles., simbologia de la soldadur a, this is generally used in the, in connections of different plates, use symbols such as the following :, the thinnest plate., welding, finished, materials, preparation, the symbolism its height, this should be done, the fillets in which is not identified in, according to the general note of the manufacturing plan., aws standard welding symbols, basic welding symbols and their location significance, location, significance, arrow side, other side, both sides, or other side , no arrow side, fillet, or slot, plug, projection, slot or, seam, backing, back or, surfacing, brazed joint, scart, flange, edge, corner, groove, square, bevel, flare-v, flare- bevel, Suplementary symbols used formally welding symbols, typical welding symbols, used, not, groove weld, symbol, groove weld symbol, convex contour symbol, weld-all-around symbol, Indicates face of weld, fo be finished to, convex contour, thod of obtaining speci-, fied contour but not of, gree of finish, weld-all -around symbol, indicates that weld extends, around the joint, joint with spacer, melt-tru symbol, note: material and dimensions, of as specified, see, note, with groove weld symbol, of spacer as specitied, with modified groove weld symbol, double bevel groove, melt-thru symbol is not, any applicate weld symbol, contour flush symbol, multiple reference lines, flush contour symbol, to be made flush.when, used without a finish, symbol Indicates weld, without subsequent, finishing., degree of finish, cified contour but not, thod of obtaining spe-, reference line nearest arrow, first operation shown on, mentary data, second operation or supple-, third operation or test, information, field weld symbol, complete penetration, location of elements of a welding symbol, supplementary symbol, field weld symbol, to be made at a place, other than that, initial construction, joint preparation, regardless of type of weld, indicates complete penetration, ba sic joint-identification of arrow side and other side of joint, weld-all-, around, field, weld, true, melt-, spacer, flush, contour, convex, concave, finish symbol, lp, side, number of spot or , projection welds, contour symbol, root opening depth of filling, for plug and slot welds, effective throat, strength for certain welds, depth of preparation, size or, or other reference, specification, process, tail, or detail reference, basic weld symbol, reference is not, groove angle: included, angle of countersink, for plug welds, length of weld, field weld symbol, arrow connecting referent to line, side member of joint, reference line, elements in this area remain as, shown when tail, and arrow are, reversed, butt joint, corner joint, t-joint, welding symbol, arrow of, other side, of joint, arrow side, sion indicates, depth of filling, filling are shown, other than depth of, and all dimension, orientation, location, on the drawing, slot welding symbol, square-groove welding symbol, flare-v a
Raw text data extracted from CAD file:
| Language | Spanish |
| Drawing Type | Block |
| Category | Symbols |
| Additional Screenshots |
 |
| File Type | dwg |
| Materials | Steel, Other |
| Measurement Units | Metric |
| Footprint Area | |
| Building Features | |
| Tags | autocad, block, coat, DWG, normas, normen, revestimento, schilder, SIGNS, standards, symbols, welding |
